Adding a new tile backsplash to your kitchen is one of the quickest ways to dramatically update the room, and it’s about the easiest project for a Do-It-Yourselfer to undertake in the kitchen.
If you’ve seen all the kitchen renovations and makeovers on TV but have been intimidated to tackle your own home backsplash project, fear no longer, because we have the ultimate guide to get you perfectly prepared to spice up that little space in your house!
Professionals typically charge around $20 per square foot to install tile on a backsplash, so you’ll be saving yourself a good chunk of money by completing this project yourself!
Feel free to browse through the entire DIY Guide in the post below, or choose from these menu items to skip directly to the section you’d like:
- Tile backsplash material choices
- Tile backsplash patterns & styles
- The process of installing a tile backsplash
- Tile backsplash inspirations
- Tile backsplash video tutorials
Tile Backsplash Material Choices
Ceramic – the basic, standard tile for a reason: it’s usually the cheapest option, available for as little as $2 per square foot. But remember, you get what you pay for! It’s fairly durable, plenty enough for a backsplash that gets not traffic like a floor does, and is made to suit an unlimited variety of styles, from natural and rustic, to chic and modern.
 via Lowes
Porcelain – a step up in quality from ceramic, porcelain tile is more durable and the exterior color is all the way through the tile, not just a thin coating on top of an inner red clay material like with ceramic tiles. Porcelain tiles can be found for roughly $5 per square foot and up.
Stone – natural stone tiles of marble, granite, limestone, or slate, can be used to create either modern or traditional styles, depending on cut, pattern, & method of installation. Stone tile can usually be found for $10 per square foot on up.
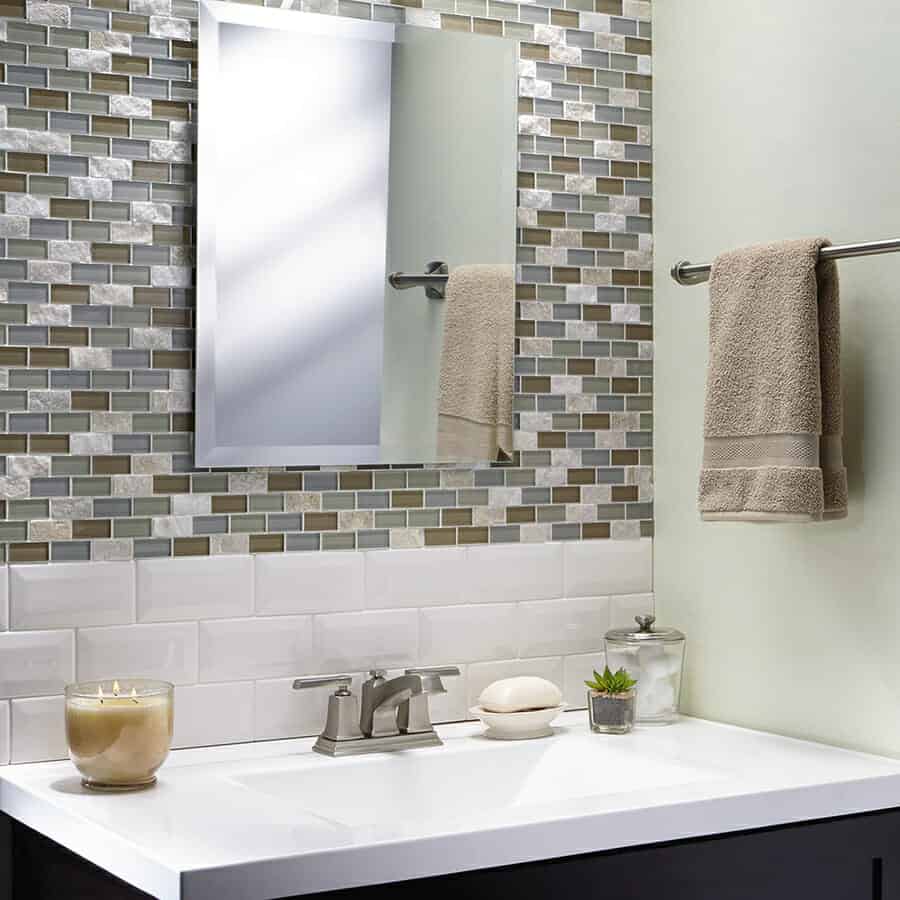
Glass – you can find glass in a variety of forms, including:
Subway tiles
Mosaic panels comprised of some or all glass tiles
Even glass panels that fit the full height of the backsplash. These are much pricier, at $45 per square foot, and care must be taken to not screw in outlets too tight or else the glass can crack.
Tin – able to stand up to both water and heat, as long as you clean them regularly with soap and water, these tiles will last a lifetime. They are perfectly suited for creating a vintage style kitchen. You can expect to pay $4 to $20 per square foot for this material.
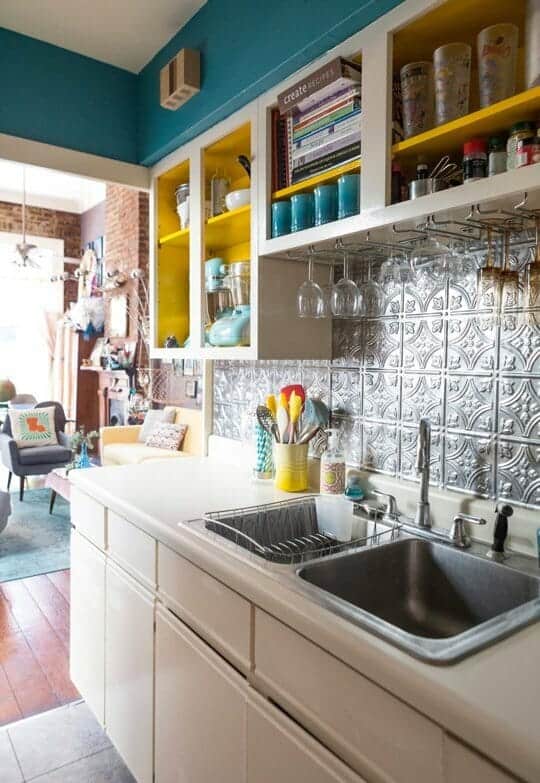
via Apartment Therapy
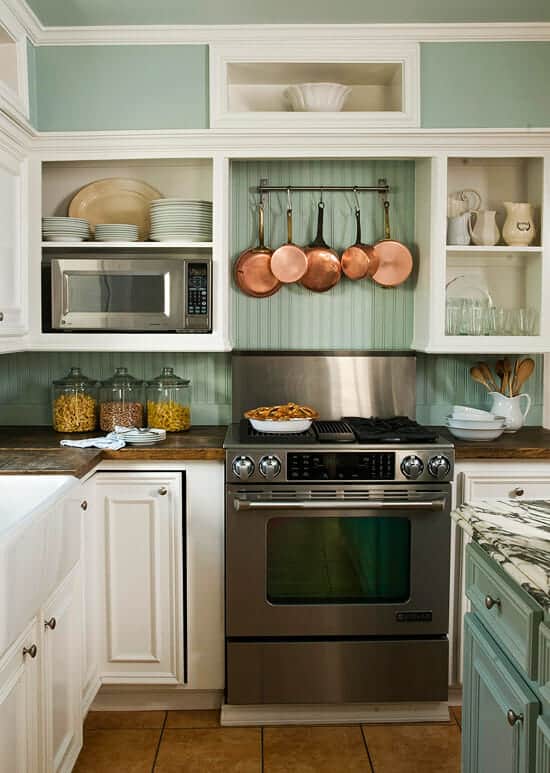
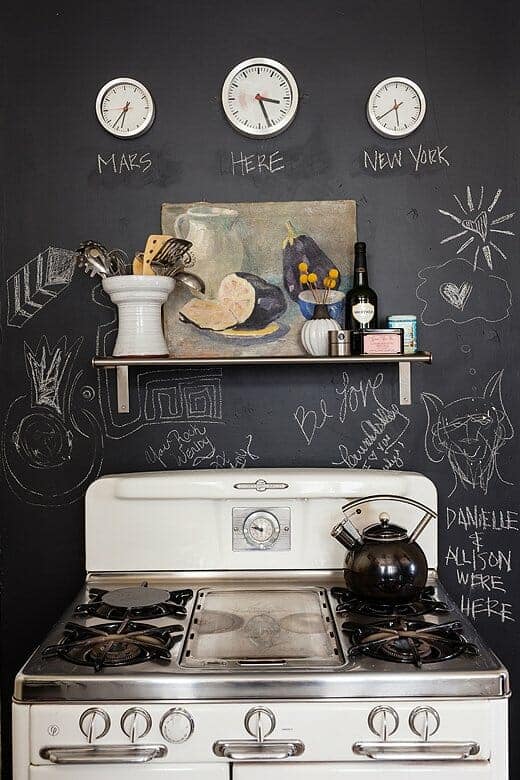
Non-Tile Materials – although this is DIY guide for tile backsplashes, there are some great non-tile alternatives including metal laminate, sheet metal, chalkboard paint surface, and beadboard.
Beadboard Backsplash, courtesy Better Homes & Gardens
Metal Laminate Backsplash, courtesy Fasade

Chalkboard Paint Backsplash, courtesy One King’s Lane
Tile Backsplash Patterns
#1 – Individual Tiles: if you have individual tiles to lay, here are some great patterns to choose from to give your backsplash some interest and flare!
#2 – Mosaic Tiles: these are individual tiles already assembled into a pattern by the manufacturer, into mesh-backed sheets, making it super simple for DIYers to install. Materials used for these are endless, including stone, ceramic, porcelain, glass, even stainless steel.
Resulting in a look such as this:
 via Smart Tiles

#3 – Pattern Inlays: Within the general pattern, you may choose to create a different pattern to create a focal point or highlight a certain area; over a range is quite common. An inlay can be made with the same tiles laid in a different pattern, or with decorative tiles of different size or shape. Doing this ratchets up the difficulty level a few notches, requiring careful measuring to make it look sharp and draw the eye where it’s supposed to. It will require extra cutting of surrounding tiles in the main pattern as they intersect with the pattern inlay area.
Tile Backsplash Styles
#1 – Clean & Simple: no frills, no patterns or unique tiles to attract the eye, a clean and simple style helps your visitors focus on other elements like floating shelves, decor, the cabinets, countertop, or even a spectacular view out the window.
#2 – Turn of the Century: the 20th century, that is. Elegant, with a bit more decoration and pizzazz to the pattern. Nostalgic.
#3 – Modern Chic: not busy or complicated, just like “clean & simple”, but with some pop of color, or a unique finish; something that draws the eye to the backsplash. It makes a statement.
#4 – Classic: Stately, elegant, simple, natural calm colors.
#5 – Rustic: It’s not just the finish of the cabinets that make a kitchen rustic; the choice of tile & pattern for the backsplash can help complete that look as well. Rough-hewn tile surface, faded finishes, and interesting patterns can all contribute to that old-fashioned look!
The Process of Installing a Tile Backsplash
An overview of the project process:
- Planning, buying materials, and gathering tools
- Prep the walls
- Set the tile
- Cut tiles to fit around edges
- Grout, clean, and seal the tile
Planning:
Of course, before ever beginning a project, you want to make sure you have everything you’ll need for it ahead of time. If you only have a weekend to complete your kitchen backsplash, you can’t have any time wasted on running back to the store for something that was forgotten or left out.
Supplies You Will Need:
- Tiles of your choice – enough to cover the square footage of the backsplash + roughly 10%
- Unsanded grout, color of your choice
- Tile mortar appropriate for the kind of tile you choose
- Metal tile trim if you have an exposed edge of the tile (I love Schluter Rondec), or Bull-Nosed Tile to match your main tile
- Plastic spacers (the kind I linked to are my favorite because they’re easy to grab onto)
Tools You Will Need:
- Measuring tape
- Non-contact voltage detector
- Receptacle box extenders
- Magic marker
- Sharp box knife or carpenter’s knife
- Tile wet saw (most expensive tool on the list. Simply rent one if this is a one-time tiling project for you)
- 3/16″ Tile trowel
- Bucket (any ole plastic bucket will do, nothing fancy)
- Power drill
- Mortar mixer attachment
- Grouting sponge
- Rubber grout float
- Plastic electrical spacers (for aligning electrical receptacles flush with tile surface in the finishing touches stage)
- Caulking
Prep:
To begin with, clean off the entire counter space. You will appreciate having all the space you can have, and you’ll make a bit of a mess with mortar and grout, so it’s best to have the entire area clear.
If there are any grease splatters on the wall, thoroughly clean those off, as mastic won’t adhere well to grease or oil. A mixture of dish detergent and water will do the trick nicely.
Turn off power at the circuit panel to the receptacles along the walls being tiled, testing them with a non-contact voltage detector to ensure power is off. Then remove all electric outlet and light switch covers that will be tiled around.
Measure the space between the countertop and bottom of the upper cabinets. Use the measurement to determine how much you may have to cut off the top row of tiles below the upper cabinet, if at all. The National Electrical Code requires outlet box extenders when the boxes are more than 1/4 inch behind the wall surface (including the finished surface of the tile once you’re done with this project). It’s easier to install the extenders now and cut the tile to fit, than adding them later.
If there will be an exposed end of the tile where the backsplash ends, cut a piece of metal edging to fit (using a strong pair of scissors or metal shears will do the trick), or the bull-nosed tile if that’s the way you chose to go.
Lay out a thin plastic over the countertops, and secure it using masking tape to tape off the edges.
Lay out some tiles on the countertop in the pattern you chose, both to verify it looks the way you want, and to have the tiles handy to place onto the wall when you’re ready.
Setting the Tile:
With everything prepped and laid out, you’re now ready to get the mortar ready. It’s simple, just follow the instructions on the bag for mixing water with the mortar (also called thinset), the proper time to let it sit and mix again, etc.
I like to use a 5 gallon plastic bucket, adding a bit of water first so that when I add the mortar to the bucket, I’m not left with a layer of dry, unmixed mortar stuck at the bottom of the bucket after mixing. I personally like the mortar to be about mashed potato consistency.
The mortar will begin setting up and drying the moment you’ve mixed it, so don’t mix too much at one time, especially in the beginning as you’re taking your time getting the hang of setting the tile.
…An alternative to tile mortar is what’s called mastic, an adhesive, roughly the consistency of peanut butter, that comes in tubs, pre-mixed, so there’s none of the mixing process like with mortar. And it does work just as well for holding tile on the walls long-term.
Starting in a corner of the kitchen, or at the exposed end if there is one, spread the mortar onto the wall with the trowel at a 45 degree angle.
Once you have a small section of wall with mortar spread evenly on it, begin laying your first row of tile flush with the top of the countertop, and flush with the end or corner you’re beginning at. Use the plastic spacers between the countertop and below the tile to create an even space, so the tiles don’t sit directly on the countertop (you’ll caulk this gap at the end). However, if you’re installing subway tile, the ridges built into the edges of the tile will naturally space the tile a bit above the countertop.
Set tiles by firmly pressing them into the mortar, making sure edges of tiles line up with previously set tile edges. You don’t have to press too hard, but firmly. If you’re installing mesh-backed mosaic tile sheets, as you go along, you may want to periodically place a board over the set tile sheets and tap the board with a rubber mallet to make sure all the individual mosaic tiles are set evenly.
For spacing the tiles perfectly and evenly, use plastic spacers between each tile you set. If you’re using subway tiles, they have ridges along each edge that naturally spaces the tiles for you, so no spacers will be needed, except with cut pieces.
Cut Tiles to Fit Edges:
When you come to corners, windows, light switches, and electric receptacles, you’ll need to cut the tile to fit the space. Start by either placing the tile in position and use a magic marker to mark on the tile where it needs cut, or using a measuring tape to measure and then transfer that measurement onto the tile.
Then take the tile to the wet saw, set up outside (because it makes a lot of noise and mess!), and cut according to your mark. Don’t be intimidated; they may be a loud piece of equipment, but they’re easy to use, especially if you just take your time.
Finishing Touches:
Once all the tile is set in place, wait about 24 hours to return to finish off the project with grouting the tile. Look over the tile and use a knife or flat blade screwdriver to remove any excess mortar that may have squeezed out through spaces between tiles.
With a smaller bucket this time than you used to mix the mortar, mix up a batch of grout. Follow the instructions on the bag, letting it stand for about 5 to 10 minutes, and then mixing once more. You’ll also need to remix the grout a few times if it’s taking you a while to apply it to the backsplash.
With your rubber grout float, apply the grout mixture to the wall…just glob it on, no worries about keeping things clean: you’ll make a mess either way. Then run your float at a 45 degree angle, diagonally across the tile to spread the grout out and into all the spaces.
Quickly wipe off excess grout with your damp sponge (not wet, just damp!). It won’t look pretty at this point, but don’t worry. As the grout continues drying, run the sponge lightly across the tile multiple times, cleaning more grout off the surface each time – but don’t press so hard that you remove grout out of the spaces where it’s supposed to stay! – squeezing out the sponge each time in a bucket of clean water.
Let it dry for an hour or two, and then wipe the surface down again with the dampened sponge. If a significant haze remains on the grout, you may need to make up a mixture of vinegar and water, and use that with your sponge to remove the haze.
Use plastic electrical spacers to align the electrical receptacles and light switches flush with the surface of the tile. Hand tighten the screws to secure the receptacles and switches, and then replace their covers.
Finally, apply a bead of caulk to the bottom edge between the first row of tiles and the countertop, as well as along the top below the upper cabinets.
Tile Backsplash Inspirations
Now that you know the complete process required to create your own kitchen backsplash tile masterpiece, here are some fantastic examples to serve as inspiration for your future project.
Tile Backsplash Video Tutorials
If the detailed instructions and beautiful images weren’t quite enough to make it perfectly clear the exact steps to take, here are some great video tutorials that will guide you through your DIY kitchen backsplash project!
The Home Depot Explains How To Install a Tile Backsplash:
How To Install a Simple Subway Tile Backsplash:
How To Install a Glass Tile Backsplash:
Buildapedia Shares How To Install a Tile Backsplash:
