The tile shower pan is the most essential component of your DIY tile shower project to get correct. A leaky shower pan will lead to many problems involving mold and/or rot, and is a nightmare to correct (usually needing to gut the shower and start over to get it right).
Here at Tile Shower DIY, I have what some have said is the best how-to guide on the Internet for teaching you step by step how to build your own tile shower pan…both the old-fashioned way using rubber liner and dry-pack concrete, or the newer, faster, more efficient way using Schluter waterproofing products.
But, there is one more alternative when it comes to shower base options.
And that is a rigid, pre-formed, “tile ready” shower pan. These are made to common shower dimensions, with a drain hole, raised sides (splash walls), and curb already built in.
You can simply slip them into the shower location when it’s ready, properly attach the drain, and then add your concrete board or other wallboard to the walls, overlapping the raised side of the pan liner.
What Are Tile Ready Shower Pans Made Of?
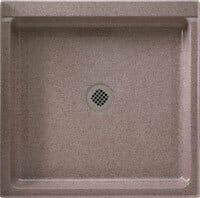
Pre-formed shower pans like these are made of polyurethane, making them durable and lightweight. Using polyurethane, they are able to be molded in one piece, with no seams, so they can be guaranteed to be waterproof.
Below, you can see what the polyurethane shower pans look like…a dense and strong plastic, while still being lightweight.
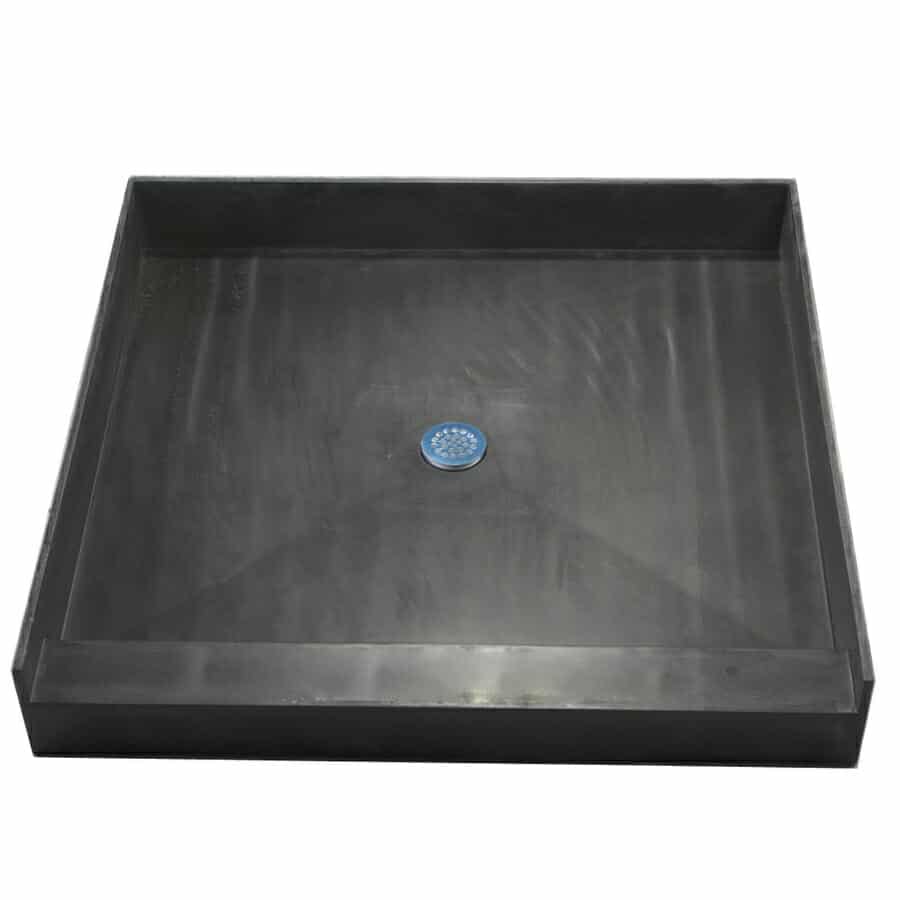
And here you can see what the underside of the shower pan looks like, with all of its support ribs and the drain body housing, of this Tile Redi rectangular model.

Advantages Of A Tile Ready Shower Pan
The biggest advantage of tile ready shower pans is the time and effort they save you.
Once installed, they’re ready for tile to be set directly on the pan surface, without the many time-consuming steps of the old-fashioned way: creating a pre-slope with concrete, cutting a rubber liner to fit and nailing to the sides, forming a waterproof curb, installing the drain, and finally creating a dry-pack mud base before being ready for tile.
They’re also guaranteed to be waterproof, having no seams, and having been formed and tested in a factory before being shipped out.
They also are mold free, which is an important factor, as dry-pack shower bases installed incorrectly can hold water under the tile and attract mold.
Being pre-formed, that means they also are pre-pitched. That is to say, you get to skip the work involved in a typical shower pan installation of getting the slope just right to get water to flow toward the drain.
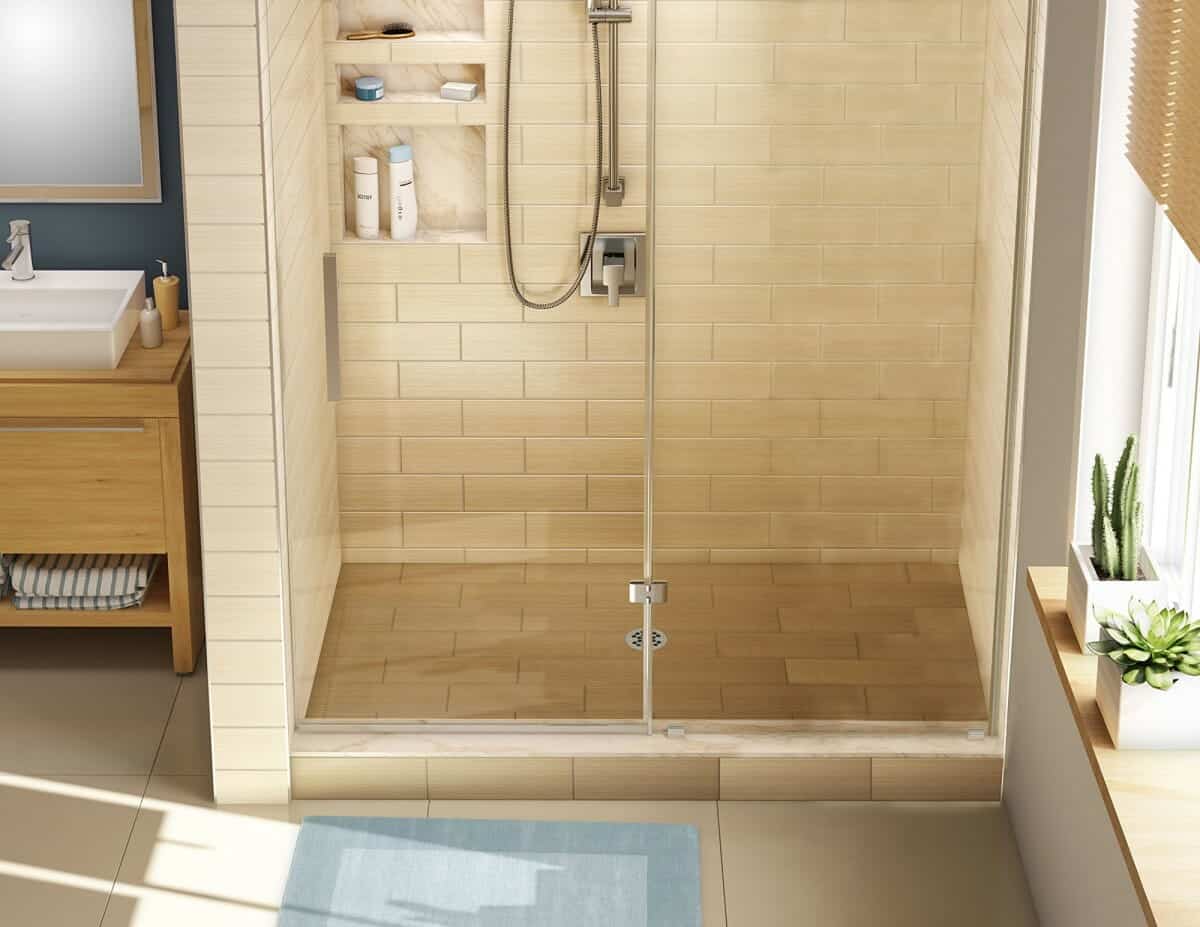
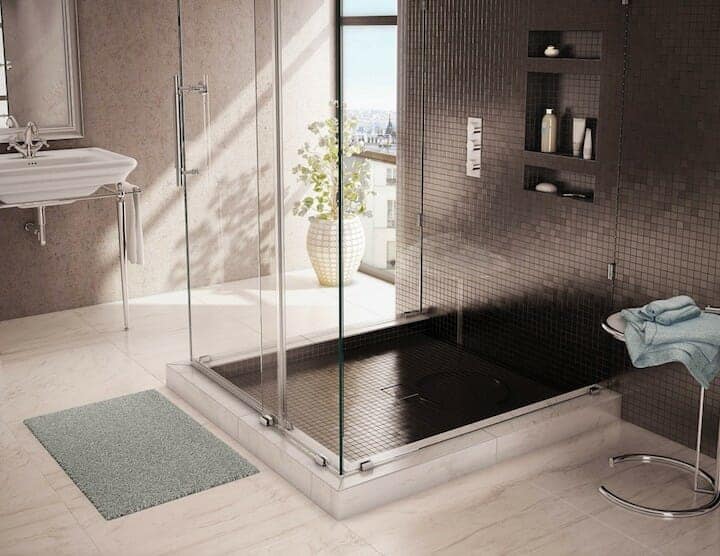
This shower was made with a Tile Redi 30″D x 42″ Rectangular Single Curb Shower Pan, which you can get from Amazon.
Drawbacks
1) The primary disadvantage is the cost. They vary in price depending on brand & size, but typically are quite a bit more expensive than what it would cost for materials to build your shower with the old-fashioned method, and slightly more expensive than choosing to build your shower with the newer Schluter method.
If you’re hiring a professional to install it for you, the savings in labor time installing a pre-made tile-ready shower pan would make up for the additional cost, since they are so much quicker to install than building a shower pan on site.
However, if you’re installing it yourself, and not paying for someone’s labor, the added cost is something to consider.
2) Second, they are available only in common dimensions. So, if your shower is going to be an odd length or width, other than what they offer, you would have to change the layout of the shower to make one of the pre-made pans fit.
Some brands do offer custom sizes, but that increases the price substantially.
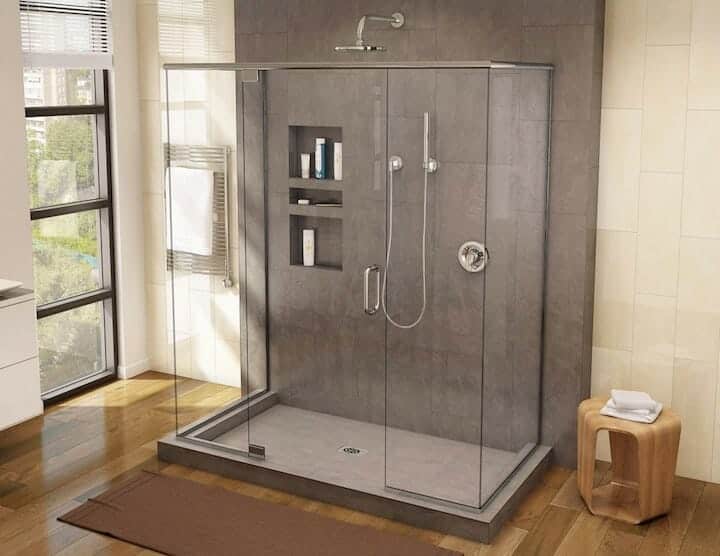
This stunning standalone shower with three curbs & three glass walls, was made with a Tile Redi 30″D x 42″ Rectangular Triple Curb Shower Pan, which you can get from Amazon.
Common Tile-Ready Shower Pan Brands
![]() Tile Redi is the most well-known manufacturer of tile-ready shower pans, and most of what they offer is available for purchase on Amazon. Their product choices include a wide range of sizes, curb widths, drain type/shape/locations, with/without bench, and shape choices (rectangle, neo, etc.). You can browse through the many Tile Redi choices here.
Tile Redi is the most well-known manufacturer of tile-ready shower pans, and most of what they offer is available for purchase on Amazon. Their product choices include a wide range of sizes, curb widths, drain type/shape/locations, with/without bench, and shape choices (rectangle, neo, etc.). You can browse through the many Tile Redi choices here.
Another good brand to compare to is One Liner, made by DIX Systems.
 Swanstone, mostly known for their composite countertops and sinks, also makes pre-made composite shower bases…BUT, they’re not actually “tile ready” shower bases, as no tile is installed on them. These composite shower pans offer yet one more choice for your shower floor, having one solid composite (like the look of quartz or granite, but manmade) surface that is the finished product, and is pebbled & slip-resistant.
The Swanstone composite product coordinates with shower walls and shower niches that they also manufacture.
Before Ordering…
Before you order, there are a few key factors to make sure you have right:
- The dimensions – Calculate the dimensions of the are where your shower will be…be precise! And, I always measure twice to be sure!
- Drain position – Left, right, center? This may be totally your choice if you can move the existing drain line around, but if it’s not able to be moved, make note of where it’s located within the shower area…having the drain hole pre-made, these shower pans aren’t forgiving if your fixed drain line location doesn’t match up with theirs
- Drain type – Standard round or square metal drain? Standard drain that is tileable on top? …Or would you like the more modern trench style drain? They offer them all, it’s your choice.
- Curb style – Will the shower be between two walls on each side? If so, you only need a single curb shower pan. But if you plan on having two or three sides exposed, you’ll want to get the proper shower base for that situation.
- Curb width – The standard is 2.5 inches, but some models are available in 4.5 inches or no curb at all.
Also, be sure this is the route you want to go. Read on to the end to hear my “two cents worth” on my personal opinion of these, so you can make an informed decision for yourself which way is best to build the shower pan for your DIY Tile Shower project.
As an example of the many choices Tile Redi offers in shower pans, this shower was made with the Redi Trench® style of drain that features a trench drain along one wall or through the middle. You can find the various Redi Trench® models on this page on Amazon.
How To Install A Tile-Ready Shower Pan
The steps for installing a shower pan like this are really quite simple. Doing it this way literally takes almost half of the steps away from what it takes to build a shower the traditional/old-fashioned way.
So, here are the step-by-step instructions for your reference:
- Measure the shower opening to ensure the shower pan you purchased will fit easily into place, allowing a 1/16″ tolerance on each side. Also make sure the bore hole of the substrate allows enough room to accommodate the shower pan drain body housing.
- Test fit the shower pan into the opening, ensuring it fits around all sides and the drain body fits into the opening in the floor.
- Prepare the drain – if you have access under the floor to plumb after installation, go ahead and glue a piece of PVC pipe to the under side of the shower pan drain opening. If you do not have access under the floor, make sure the drain pipe stubbed up through the floor is cut and adjusted to a height that will fit properly into the shower pan drain connection
- Apply a 1/2″ to 3/4″ dry set mortar bed to the substrate.
- Set shower pan onto the mortar bed, and use a rubber mallet or hammer & board to press the pan firmly into the mortar bed, providing even coverage, and leveling all sides of the shower pan
- On sides that are against a wall, place Redi Flash on top of the splash edges and fasten to the studs. Then place a bead of 100% silicone caulk along the top of the Redi Flash.
- Mount wallboard to the studs, leaving a 1/8″ gap between the bottom of the wallboard and the top of the splash edge and flashing that you just placed a bead of caulk on.
Here is a video from Tile Redi that explains quite well the installation steps for one of their shower pans.
After you’ve installed wallboard, and properly sealed & waterproofed everything, and you’ve tiled your shower walls, tiling the shower floor and curb are last.
First, adjust the height of the shower drain top as necessary to line up with the finished height of the tile.
Every shower pan purchased comes with their specially formulated Redi Poxy™ epoxy that you’ll use to adhere your tiles to the shower pan. Follow the instructions on the bag of epoxy for this step.
Top Choice For Tile Ready Shower Pans
When it comes to pre-made shower pans for tile shower floors, Tile Redi is really the brand that stands out above the competition.
If you want a shower base that doesn’t need tile at all, something like a Swanstone composite shower base would be the route you’ll want to take.
But, if you’re going to tile over whatever the shower base is, and you want a pre-made, rigid, shower pan, Tile Redi shower pans are the best ones.
You can see all of the various options to choose from here on this Amazon product page. As I mentioned above, you’ll be able to narrow down your choices with shower pan shape, size, number of curbs, drain type, etc.
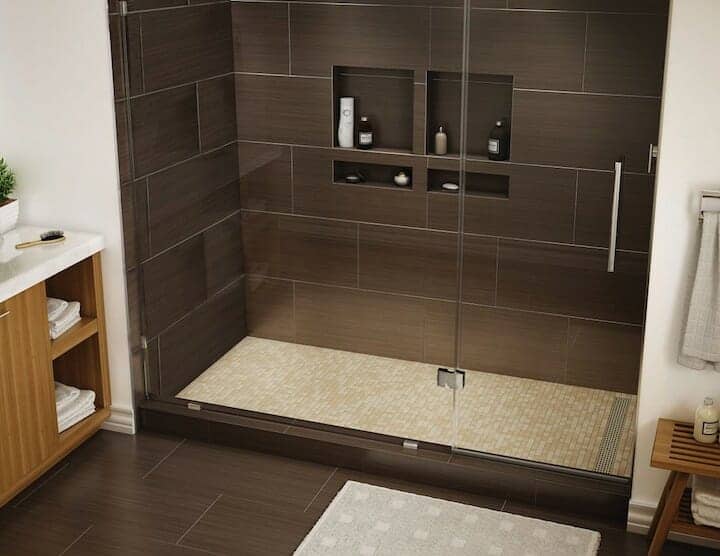
This shower was made with the Tile Redi Wonder Drain square triple curb shower pan, which has a drain that your shower floor tile is adhered to the top of, so it blends with the shower floor tile.
My Final “Two Cents” On Tile Ready Shower Pans
In the end, there is no right or wrong method for you to choose – traditional vinyl liner and dry pack mortar bed, Schluter waterproofing system, or using a tile ready shower pan like these – it really just rests on personal preference and the details of your personal situation.
If you are undertaking your DIY tile shower project on a budget, you may want to go with the traditional vinyl liner method, which you can follow my thorough Tile Shower Floor Pan Construction guide to help you accomplish. Doing so, will cost you the least amount of money on materials…but know that it will make up for that in amount of time to complete.
If time savings are your ultimate goal, then I would recommend a tile ready shower pan like those made by Tile Redi, as it cuts down significantly on the time it takes to build the bones of the shower. It will cost more, but save you a lot of time. This recommendation does depend on your shower opening having a common dimension that Tile Redi has shower pans made available for.
My personal preference, based on all of my experience installing showers, is using the Schluter Systems products to build a shower enclosure from scratch. A big part of this is that almost every shower I’ve installed ends up having some custom feature or oddball dimension that would rule out a pre-made common dimension shower pan.
The cost of building a shower with Schluter products comes out close, but a bit less, than buying a tile ready shower pan. And the time it takes is more than a tile ready shower pan, but still much less than the traditional vinyl liner method.
It’s kind of the middle choice of the three.
So, that’s my two cents worth of advice…apply that bit of info to your situation to help you determine which route is best for you.
Any way you choose, I’ve got the help and recommendations here for you at Tile Shower DIY, where you’ll find more reviews like this one, ideas & inspiration, and in-depth how-to guides on all phases of tile shower construction and other DIY projects in your bathroom.
If you think a Tile Redi Shower Pan is the way to go for you, click here to check out all your choices on Amazon.