Showers with no raised edge – whether you call them Curbless, Roll-In, Lipless, or Zero-entry – are becoming quite common today in custom shower design.
While they’re often associated with the thought of making a bathroom handicapped & wheelchair accessible, curbless showers aren’t only used for that functional purpose, but also popular for the style they can bring to a new, updated, luxurious bathroom. A zero-entry shower provides a sleek, simple and modern look, as the bathroom floor seamlessly transitions right into the shower floor.

With that said, those are the two primary reasons people are interested in curbless, zero-entry showers today: either for making their bathroom more handicapped accessible, or simply for the sleekness & simplicity of design they offer.
Two very important reasons, but each quite different from the other, so we’ll cover both aspects in detail, that way you’re informed no matter which you’re here for!
We’ll cover how to build one yourself, as well as review some of the best pre-made curbless showers available on the market, and give some design tips and ideas.
But first, let’s cover some of the basics of curbless “Roll-In” showers…
What is a Roll-In Shower?
A “Roll-In” shower – as previously mentioned also known as curbless, lipless, and zero-entry – is a shower without a raised curb at the entry or shower opening, allowing a wheelchair to roll into the shower. The exception is some Roll-In showers may have a small “speed bump” like curb, or raised threshold.
A shower like this can be custom built by a Do-It-Yourself Homeowner, ready-to-install units can be purchased online or through local home improvement stores, or one can hire a local contractor to install one for them.
Depending on the architecture of your home, the type of subfloor and structure below the floor, it may be very simple to modify your bathroom to have a zero-entry, roll-in shower, or it may be more complicated requiring floor joists to be trimmed down some and new subfloor installed…but we’ll cover all of that in the How To Build Your Own section!
Benefits of a Roll-In Shower:
Bathing for elderly or handicapped is not only more difficult, but more dangerous as well. If it’s the accessibility you’re interested in, a properly designed curbless roll-in shower can make showering safer and easier for the handicapped in your home, while also being quite functional for the rest of the family.
- Create independence without sacrificing safety
- Allow for more rolling and moving space in the bathroom
- Makes a smaller bathroom much more accessible
Likewise, if it’s the look & style of a curbless shower that you like, there are several great benefits of a Roll-In shower:
- Easier to clean without the curb or ledge, which is a place that commonly attracts the growth of mold and mildew in the standard shower
- A seamless transition from bathroom floor to shower floor simplifies the space, lending to a sleek & modern style
- Can make a small bathroom appear or feel larger than it is
This is a lengthy post, as I wanted to cover every aspect of Roll-In Curbless Showers as possible. Here’s an outline of what you’ll find, so please feel free to click to skip directly to the part you find most helpful or relevant to your situation…
Section 1:
Roll-In Showers For Accessibility
What makes an “Accessible Shower”?
An accessible shower is essentially a shower whose design, construction, layout, and accessories all work for everybody.
Here are some key characteristics an accessible shower should have:
- Easy to enter & exit for all levels of mobility – from walkers to those bound to wheelchairs
- Accessories and design elements such as the shower controls, shower wand or head, soap & shampoo niches/shelves, etc., are all easily reachable from either a standing or seated position
- Has a bench, seat, or ideally a built-in folding shower bench for handicapped or those who can’t stand for long to bathe sitting down
- Shower floor has a slip-resistant surface
- Shower controls are large and easy to use – preferably no knobs, which are hard to turn for elderly and those with arthritis, but levers instead
- Consider adding a hand held shower wand in addition to the permanent shower head fixture, for bathing while seated
- Grab bars are present, and strategically placed to give balance and support to elderly or handicapped, and to give them more independence in the shower
- Area just outside the shower has ample open space, free of obstacles, so a person with walker or wheelchair can easily get into shower
Let’s discuss some of these in a little more detail…
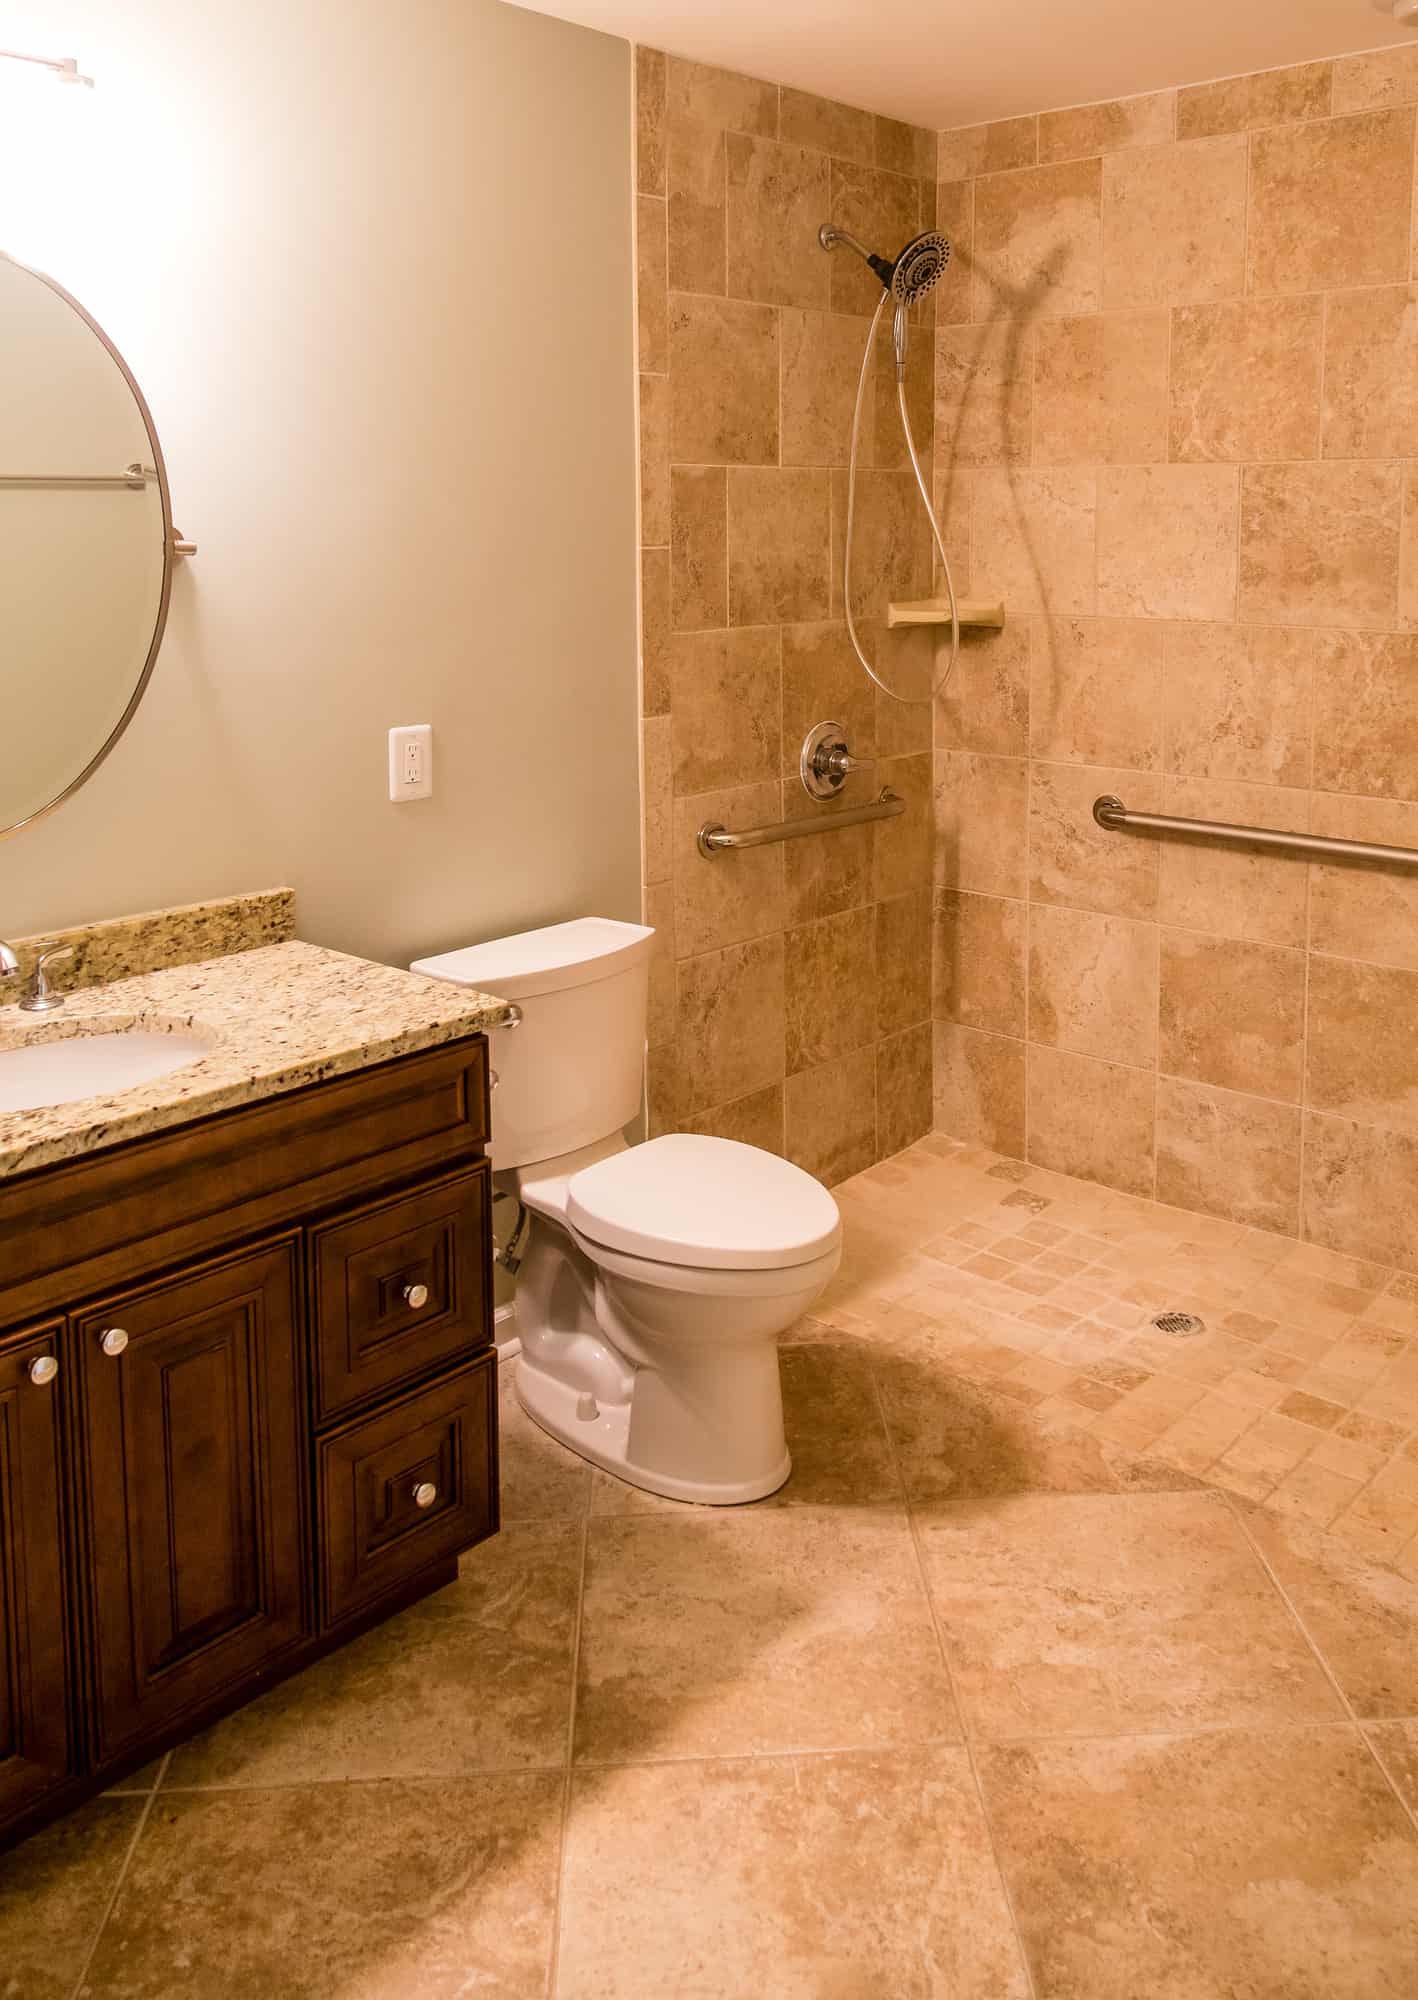
1. Width of opening
The opening needs to be at least 36″ wide, and preferably even wider, to allow a person with walker or wheelchair to easily enter the shower, or transfer from outside of the shower onto bench seat inside the shower.
2. Shower controls
You want large, easy to turn on & off lever type shower controls…preferably not knobs which can be hard to turn for elderly or those with poor hand strength or arthritic conditions.
Also, in construction of the shower, be sure to place the shower controls close to the opening so someone in wheelchair or a caregiver can turn on/off from outside the shower without getting wet, and in a position that makes it easy to adjust once in the shower.
3. Adjustable shower head on a slide bar and/or handheld shower wand
While most of us are used to the shower heads typically being fixed high on one wall, this placement will be too far away from where a bather seated on a bench will need to take their shower. By installing a hand held shower head, adjustable shower head on a sliding bar, and/or a hand held shower wand, you can greatly improve a bather’s ability to shower independently while seated.
The best adjustable shower head models consist of the standard permanently fixed shower head at the top, along with a vertical slide bar attached to the wall, with a shower wand/head on a long hose that can be held by hand or attached to the bar and slip up/down to hold it in a certain place for the bather.

Photo by ONNE Beauty on Unsplash

4. Seating
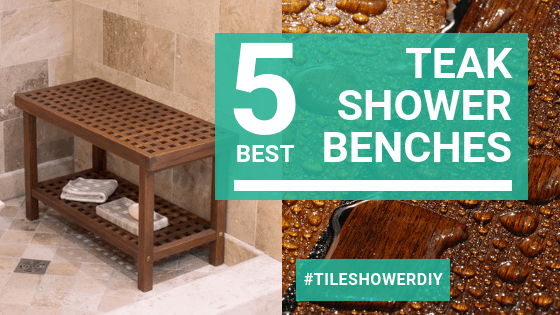
If building your own roll-in shower, you may also consider installing a folding bench, instead of a permanent built-in bench, which will give more room for maneuvering a wheelchair into the shower with the ability to fold up the seat…and folding up the bench seat gives non-wheelchair dependent bathers more room to shower with it folded up as well.
You can have a shower bench built into the structure of the shower, or there’s a wide variety of shower seating available on the market, including chairs & benches, both portable and those designed to be a permanently attached fixture of the shower. The wall-mounted shower benches are typically your most stable, and you should get a folding kind so that it can fold up and out of the way for others who use the shower without needing it.
Make sure to follow the ADA guidelines we talk about further on, placing one end of the bench close to the shower opening so a person with a wheelchair can transfer easily out of it and onto the shower bench independently.
Tub Transfer Benches – Another option to consider for both a traditional shower with threshold or if your only option in your home is a standard bathtub, is a tub transfer bench. A transfer bench is a portable, free-standing seat that fits over the edge of the tub, or shower threshold, both inside and outside of the tub or shower. This allows a person with limited mobility to sit down on the bench outside of the tub, easily & safely lift their legs up and over the edge, and then slide across into the tub. They’ll often have a place to hang a washcloth, can have a cutout to serve as a commode for those who can’t reach the toilet quickly enough, and they can have handles or grab bars built in as well.
5. Soap Dishes and Shampoo Niches
Consider placing them lower than you normally would, so a person in a wheelchair can easily reach them.
6. Shower floors
The ideal shower floor surface in an accessible shower is made of a non-glossy, slip-resistant material. Anything with a COF (coefficient of friction) of 0.6 or greater is safe and acceptable. Some examples of this would be quarry tile with many narrow joints, porcelain tile with a textured finish, and textured floors of pre-made shower pans.
If you’re going to install tile for your accessible shower floor, use smaller sized tiles, such as 2 inch x 2 inch square tiles, which lead to a greater amount of grout lines, which provide more friction and reduce slipping. But also make sure not to make grout lines TOO big (no wider than 3/4″), as that would lead to walker and wheelchair wheels getting caught, and making it more difficult to move around in the shower.
7. Lighting
Unfortunately, with age comes poorer eyesight. So, it’s important to maximize the amount of light in the shower and in the bathroom. The average shower doesn’t have lighting directly above it…whether you’re remodeling for an accessible shower or not, I recommend every new shower construction have additional lighting built in above the shower, making for a brighter shower space.
You’ll want to use a light with a waterproof lens, like these:
Also, shower curtains should be transparent enough to let light through from the room into the shower.
Outside of the shower, like by the vanity, bright task lighting is also recommended…the brighter the bathroom the better, for everyone alike!
8. Should I have a shower door or shower curtain?
If you’ve wondered this, don’t worry, it’s a common question we hear from people planning for a more accessible shower. If the shower enclosure is large enough, and the water spray far enough from the entry area so water doesn’t easily get out of the shower, you may not need either. But most showers need something to protect the rest of the bathroom floor from getting wet, and also to help keep heat in the shower.
Shower curtains are typically the preferable choice over shower doors, because a shower door adds one more obstacle for a person with walker or wheelchair to manage…especially if the shower door has a frame running along the bottom, causing a tripping hazard.
If you do choose to install a shower door, be sure it swings outwards. If someone falls while inside the shower, their body can block the door from opening if it’s an inward swinging door, making it difficult for rescue personnel to get them out.
9. Anti-Scald Protection
These aren’t only for protecting babies and toddlers…Many falls occur when a person backs up quickly from excessively hot water or when water temperature changes unexpectedly, so some anti-scald or temperature moderating protection could prevent that from happening.
10. Mirror in shower
It’s not a necessity, but a fog-free mirror in the shower can be quite handy for men who like to shave while in the shower.

11. Towel rack or hook
Make sure a towel rack, bar, or hook is close to the shower opening and easily reachable from the shower seat.
Americans with Disabilities Act Accessibility Guidelines
The ADA (Americans with Disabilities Act) has laid out strict guidelines on what it takes to make a public facility officially accessible to handicapped and disabled people. If you’re designing and planning a remodel of your personal bathroom, these guidelines from the ADA don’t apply, but if you’re planning it for accessibility, they provide a great standard to go by.
- Has a zero barrier entry, or can have a threshold up to 1/2 inch high
- Inside dimensions of the shower must be at least 60″ deep by 30″ wide
- Must have a minimum of 30″ wide by 60″ deep area of open floor space adjacent to the opening of the shower (Exception: A lavatory can be present in that space if it is opposite the shower controls and shower seat if present)
- Has a grab bar on the back wall extending at least 18″ from the wall with shower controls

2010 ADA Standards for Accessible Design – Page 176
- Shower interior dimensions must be at least 60″ by 36″
- Shower opening must be at least 36″ wide
- Grab bars present on back wall and side wall opposite from shower entry

2010 ADA Standards for Accessible Design – Page 176
Here are a few other things to note that are detailed in the ADA guidelines:
- Thresholds shall not exceed 1/2 inch high
- Grab bars must be 1.25 to 1.5 inches in diameter, have a 250 pound load rating, should be mounted 33″-36″ from the floor, and must not be placed directly above the seat
- Shower seats must be a folding type, have at least a 250 pound load rating, should be mounted 17″-19″ from the floor, on a side wall adjacent to the controls, and from the back wall to a point within 3 inches of the shower entry.
- Shower ramps no steeper than a 1:8 grade may be used if you must have a threshold higher than 1/2″ but no greater than 3″ high.
Section 2:
Curbless Showers For Their Modern Design & Appeal
You don’t have to trade style & luxury for safety & function…you can have BOTH. Just because they’re more accessible for those who are less mobile, doesn’t mean your curbless shower has to look like it belongs in a hospital.
…And with some of the shower pans, waterproofing systems, drains, tile, and accessories that are available today, it’s a project the average Do-It-Yourselfer can tackle and end up with a great result that looks stunning & stylish!
A curbless shower can be a key piece in helping you create a modern bathroom with cleaner & simpler lines and less clutter. Also, without a raised shower curb, you’ll have fewer “nooks and crannies” to clean and potentially have mold or mildew growth in.
In short, a curbless shower done right can provide both a functional, easier to use shower, AND a very attractive focal point of a modern bathroom. For these reasons, it’s no surprise roll-in curbless showers have become a popular item in new homes and bathroom renovations.
Roll-In Curbless Shower Design Tips
Here are some general tips and ideas to keep in mind in planning for a curbless shower in your new bathroom or bathroom renovation.
Linear drains
If you don’t like the look of the typical round shower drain in the center of the shower, with a slope pitching in toward the drain from all four corners, and think maybe it looks “old-fashioned”, you’re in luck…
There are a lot of drain options available on the market today, and it’s amazing how just a simple change of drain style can make such a big impact on the look of the shower.
My favorite design or layout is using a trench drain that runs alongside the wall opposite of the shower entry, and a floor with a single slope from the entry side to the drain side (no multi-pitched slope from all sides toward the middle).

The picture above shows three options of linear drain covers made by Schluter:
- brushed stainless steel grate/cover that is solid
- brushed stainless steel perforated grate (square holes)
- or the frameless tileable cover
…And each type is available in a wide variety of lengths, so the drain will fit just about any size of shower. There are other good brands as well, but I’m most familiar with using Schluter Kerdi-Line in my installations, and have always been pleased with them.
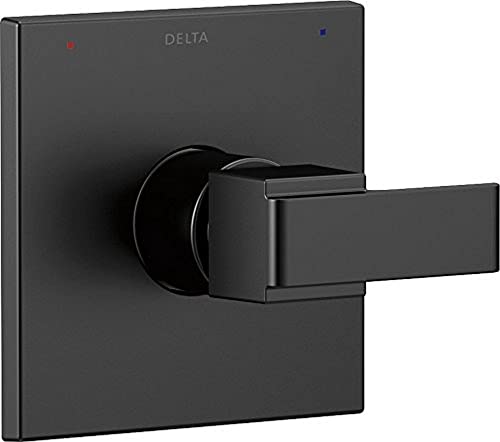
Lever type handles
Most shower controls sold today are some form of lever, but it’s still worth a mention to go with lever type handles, as they’re easier to turn on/off for elderly or those with reduced strength or grip due to things like arthritis, but the lever style also provide a more modern look.
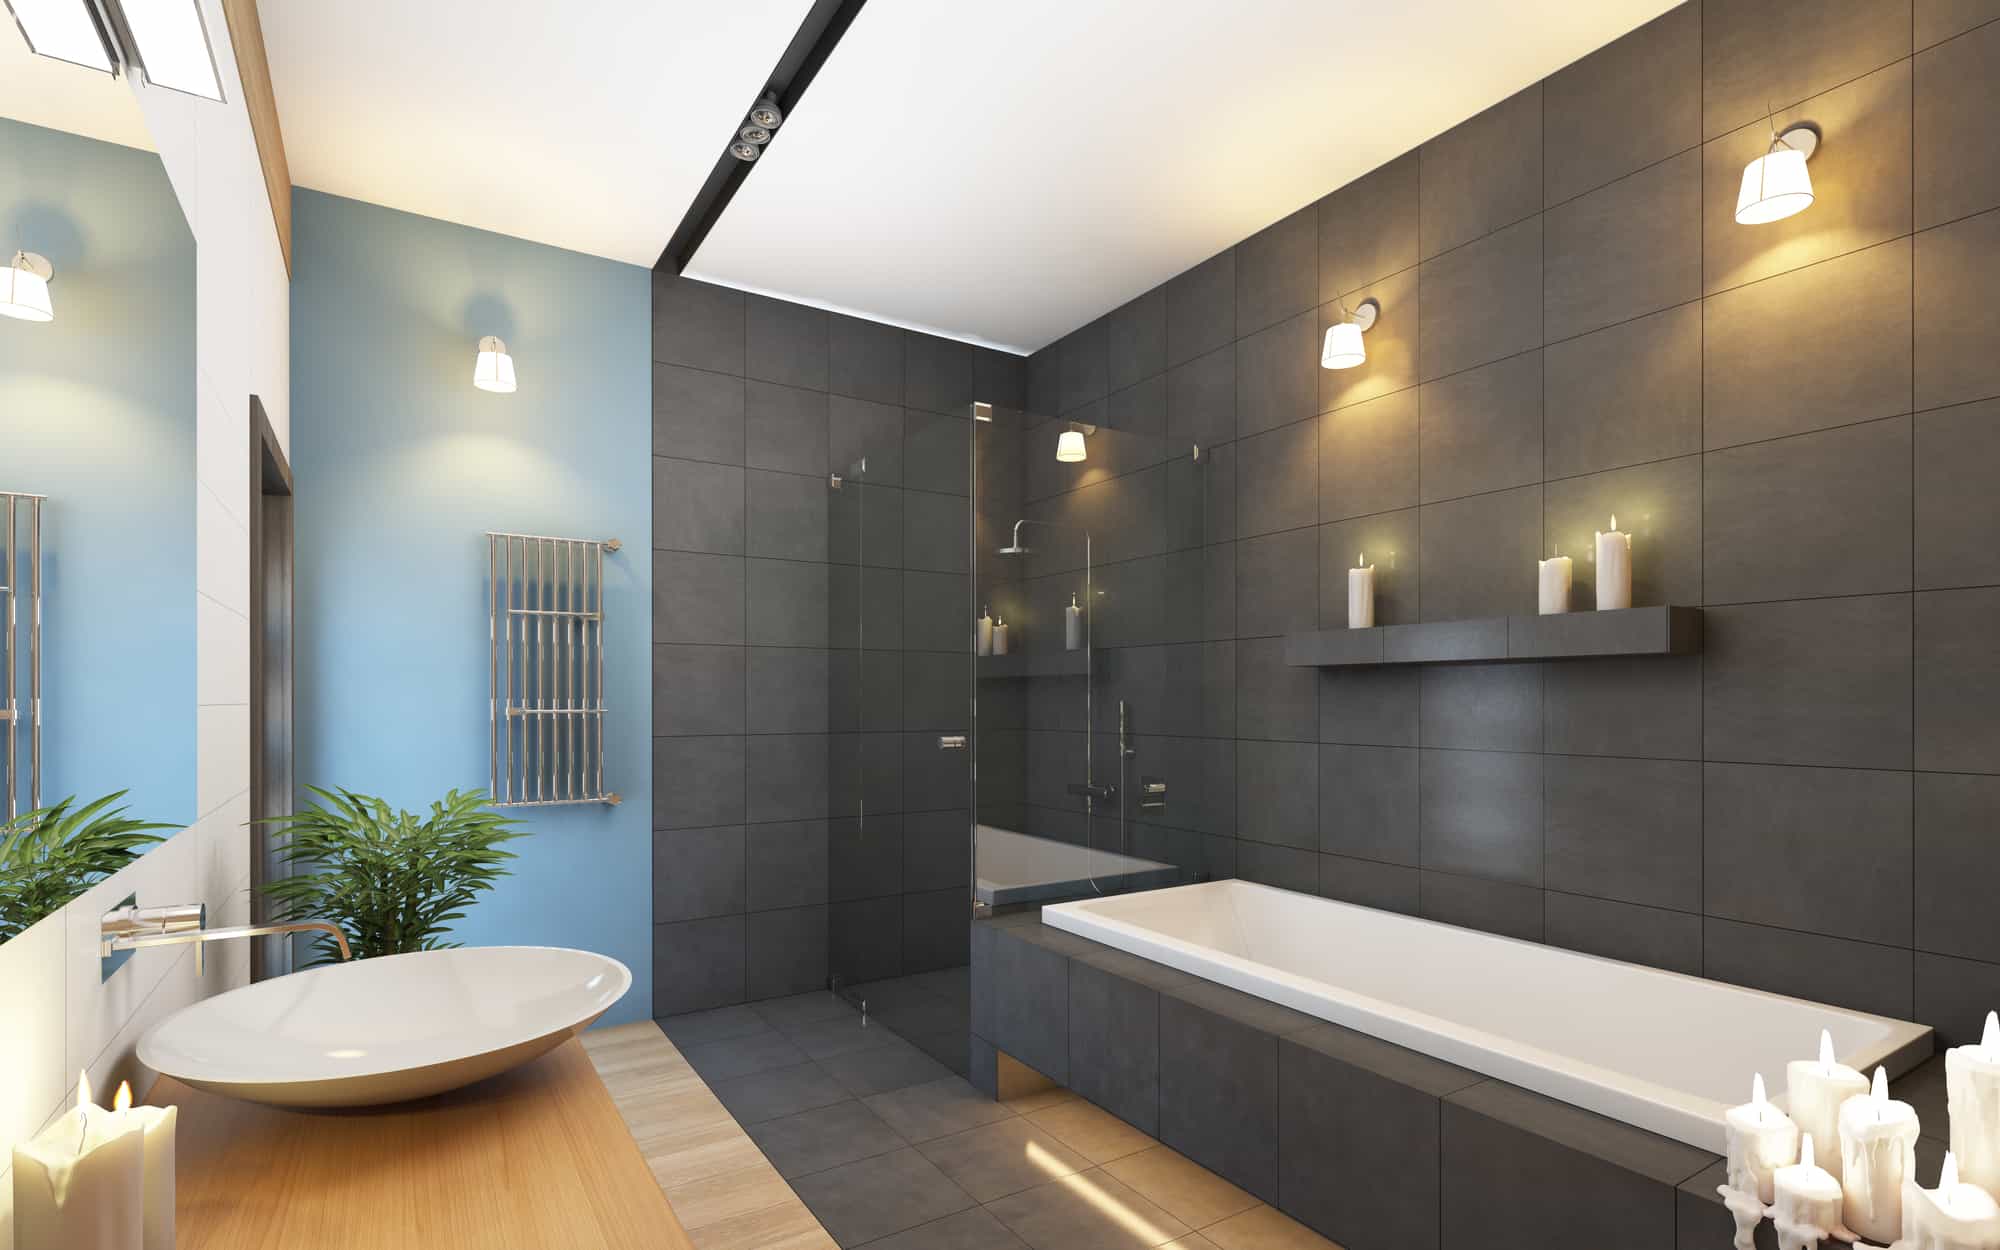
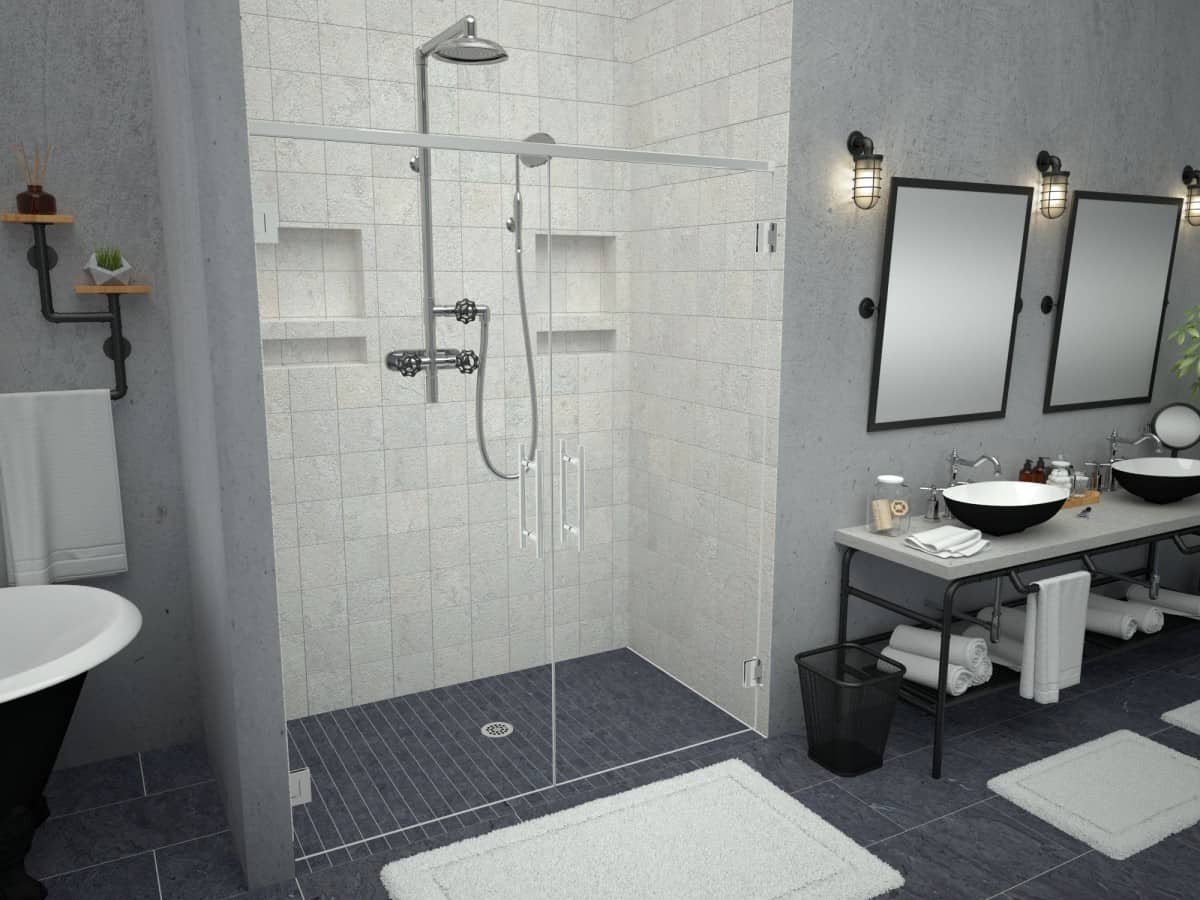
The shower door
If you have the space in the bathroom for a shower large enough that doesn’t need a door at all – meaning the shower head and resulting shower spray can be far enough from the shower opening/entrance that water doesn’t splash out onto the bathroom floor – that will give you the hottest, most modern look to your curbless shower.
Now I will add, while some people want the clean look of a doorless shower, others want a door to keep the shower warmer. A compromise of the two is having a doorless opening, along with a pony wall & “splash panel”, or floor-to-ceiling splash panel, which is a glass shield that still keeps in some of the heat close to where the shower head is, but protects the rest of the bathroom from getting wet.

This stunning curbless shower has a pony wall & splash panel to keep the showering area warm and to keep water from spraying into the rest of the bathroom. This was created by Shower Doors of Austin, and you can see more of their work here.
Section 3:
Ready-To-Install Handicap Accessible Showers & Tubs
Single-piece or multi-piece units are available on the market. Single-piece showers & tubs are easier to install, but make sure you check the dimensions of the unit you choose will allow you to fit it in through doorways in your house. If you’re planning to have on installed in a new home, this is less of a concern, as they’re usually brought in during the framing stage.
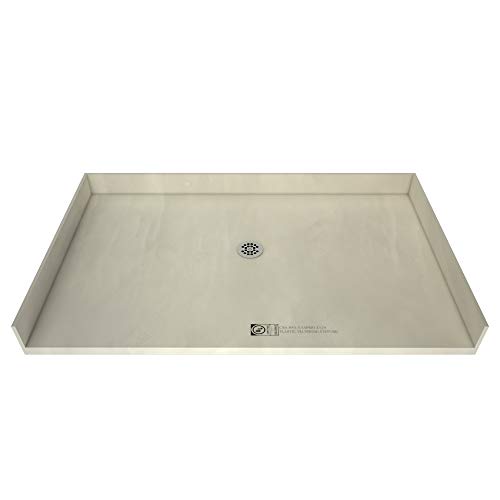
Tile Redi® – Redi Free® Shower Pans
There are a handful of great curbless shower pans on the market, but these ADA compliant, barrier-free shower bases, comprised of expanded polystyrene, and made by Tile Redi®, are just as the name implies – single, waterproof, shower base units that are ready to tile once installed.
Take Note: these are only the shower base/pan that are pre-made and ready to install – which is a BIG part of building a shower – but only part of the shower. Once one of these bases is installed, you will still need to waterproof the walls/enclosure, and tile and grout the shower, along with adding a glass shower door if desired.

Many different dimensions are available, as well as drain locations (left, center, right, trench drain), and color/finish of the drain grate.

You can click here to see a whole page of options on Amazon, showing many of the common sizes of Tile Redi barrier-free curbless shower pans, along with their various drain locations.
Walk-In Tubs

Similar to roll-in showers, in that they give elderly or handicapped people the ability to bathe independently, but instead of showers, they’re bathtubs. Walk-In tubs have a water-tight door built into the side of the tub for the bather to easily enter and exit. A person in a wheelchair can’t roll into the tub like they could a roll-in shower, but the walk-in tubs have a built in seat they can maneuver into.
You may have seen TV commercials for one particular brand of walk-in tubs, the “Safe Step Walk In Tub” or perhaps the “Kohler Walk-In Bath“, but there are many similar models available on Amazon from other brands of equal quality with great customer reviews.
Although it’s not the focus of this post, I wanted to at least touch on walk-in tubs as an option for accessible bathing in your bathroom. They can be expensive, but could be just what you need for your bathroom, depending on your situation. If it seems like a good solution for you, you can check out the models that are available on Amazon, have it shipped to you, and hire a local contractor or plumber to install it for you.

Section 4:
How To Build A Roll-In Shower

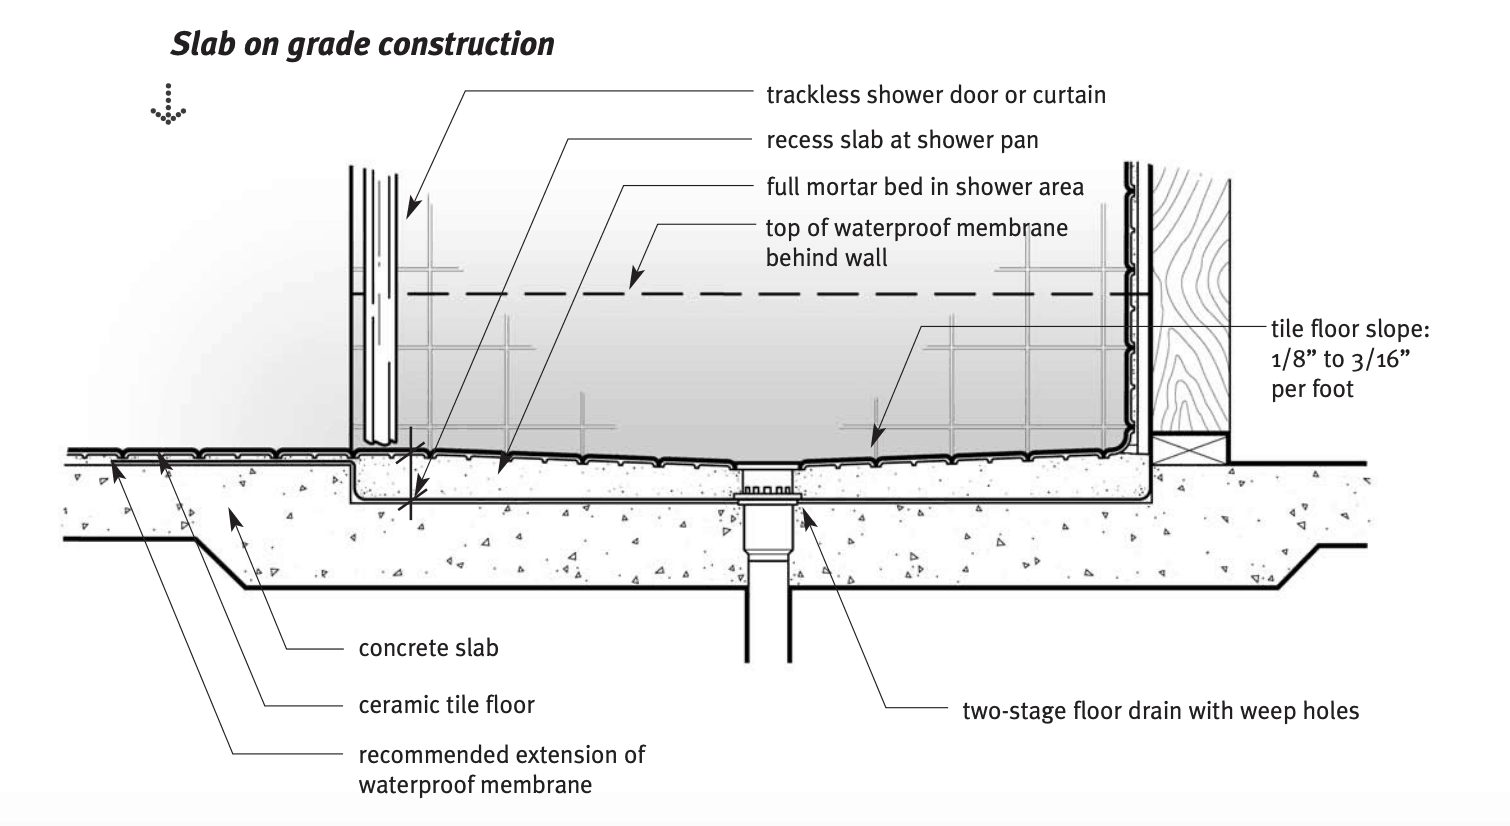
Building a handicap accessible roll-in or curbless shower entails essentially the same process as a normal custom shower build – framing the shower enclosure, plumbing the water supply & drain, installing a shower pan, waterproofing the shower, and tiling – except for one big difference: lowering the floor below the shower.
With a roll-in shower, you’re not going to have a curb to keep water in, and the floor surface at the shower entry will be at the exact same height as the surface of the bathroom floor. But the construction of the shower pan, depending on its thickness, takes up anywhere from an inch to several inches…
For this reason, you’re going to have to take the steps needed to lower the subfloor level below the shower…OR use one of a few other products on the market if that’s not an option or something that you want to do (like a ramped shower base mentioned further on).
Here’s a rundown of the steps you’ll need to take to prepare your bathroom with wood floor joists and subfloor for the base of your new roll-in shower:
- First of all, before actually doing anything, check with an engineer and city or county permitting office to ensure you make this major structural change in compliance with your local codes.
- Plan, measure out, and mark exactly where the new shower will be.
- Remove the subfloor material under the space where the shower will be.
- Before cutting the joists, take into consideration any exceptional load that may currently be supported by these floor joists, and add a temporary wall below the shower area if necessary.
- Carefully cut out the top few inches of floor joists within the shower perimeter – do the math on the thickness you’ll need removed based on the kind of shower base you’re using and its thickness, so your final surface level of tile in the shower and the floor outside the shower will be even.
- Doing this will weaken the floor joists, so attach a 2×6 or 2×8 (depending on how big your floor joists are) brace on each joist.
- Lag bolt each brace into place with hot-dipped galvanized 1/4″ x 3″ lag bolts.
- Re-plumb the drain line where it needs to be to line up with the drain hole of the new shower pan.
- If the joist spacing is 24″ or wider, you should consider adding some blocking between the joists for added strength
- Install 3/4″ plywood on the notched out area of floor joists after you have applied a generous bead of construction adhesive, then nail or screw the plywood to the joists.
- Apply a moisture barrier to the plywood.

Page 7 of NC State University Center for Universal Design “Curbless Showers: An Installation Guide”
- First of all, before actually doing anything, check with an engineer and city or county permitting office to ensure you make this major structural change in compliance with your local codes.
- Plan, measure out, and mark exactly where the new shower will be.
- Saw cut around the perimeter of where the shower will be – here’s where the job of prepping for a curbless shower is dirtier and messier on concrete than on wood floor joists!
- Jackhammer out at least a 3 inch depth of concrete, and since most home slab floors are only about 4 inches thick, you may end up tearing out all of the concrete, down to the gravel base…but that’s fine, as it will allow you to more easily move the shower drain line as needed.
- Re-plumb the drain line where it needs to be to line up with the drain hole of the new shower pan.
- Level and compact the soil/gravel base
- Pour and level concrete up to the level you determine you need the new concrete subfloor height to be at (e.g. 3 inches below level of home slab floor), depending on the thickness of the curbless shower pan you’re using, so the final surface levels of tile inside and outside the shower will be even.
Page 7 of NC State University Center for Universal Design “Curbless Showers: An Installation Guide”
…Now you’re ready to install your actual shower pan, whether that be an old-fashioned rubber liner and dry-pack cement pan, or the most common modern method of utilizing some kind of pre-made shower pan kit, such as Schluter Shower Systems, a pre-made tile ready shower pan (like from Tile Redi), or some kind of solid surface material (e.g. Swanstone or Onyx).
For the rest of the steps to complete your custom tile shower, if you’re unsure, check out these posts here at Tile Shower DIY:
- How To Build A Tile Shower Floor Pan
- How To Build A Shower
- Waterproofing A Tile Shower
- How To Tile A Shower
Optional step: Added Shower Water Dam

This image from “Curbless Showers: An Installation Guide” put out by the NC State Center for Universal Design
If you’re not confident water will stay inside the shower based on the design, layout, or size of your new roll-in shower, you can install a “water dam” just inside the shower on the sloped floor. Being basically a flexible seal the wheelchair can easily travel over, these are designed to provide wheelchair users access into the roll-in shower, while containing water. It can be used along with a shower curtain to keep water in the shower enclosure. These shower water dams fasten to the shower floor in one of three ways:
- Peel-and-stick high-strength adhesive strips – maybe your cheapest option, but least attractive, and I wouldn’t count on that adhesive to last very long!
- A horizontal flange that is placed under the finished tile
- A rounded/raised neoprene gasket that is held up by a low aluminum threshold
Installation of the last kind will require the use of a hack saw, tape measure, silicone bathroom caulk, and stainless steel screws. Securing the track to the shower base with stainless steel screws is recommended.
A shower rod and curtain provide the least expensive solution to keeping the water in a small shower, and the curtain should hang 2 to 3 inches into the shower from where the slope of the shower floor begins. If you’ve chosen to installed a shower dam, make sure the shower curtain hangs 2 inches inside the dam.
Choose Your Shower Base
Once you have the subfloor lowered and prepared, there are 5 main options for the type of shower pan you can build to have a barrier-free roll-in shower:
- Custom build
- Tile-ready expanded polystyrene shower base
- Ramped solid surface shower base
- Fiberglass or acrylic shower base (least attractive, but most inexpensive)
- Create a “wet room” where entire room drains toward shower drain (wall-mounted sink, toilet, and other fixtures)
1. Custom build
A custom built shower pan is a fair amount of work, but very doable as a DIY project, with some learning & planning ahead of time to know how to do it right (which we cover here at Tile Shower DIY on this page, How To Build A Tile Shower Floor Pan). Using some kind of waterproofing shower kit such as Schluter Shower Systems will help you build the shower pan more easily and quickly than the old-fashioned method of building up a waterproof shower pan.
2. Tile-ready shower base
Of course, as mentioned earlier, you can get a prefabricated, ready-to-install & ready-to-tile shower base. They’re well built, solid & durable, one-piece units that you simple adhere to the floor, and then build the shower walls on top of it. Tile Redi is one of the most popular and highly rated brands that make a tile ready shower base.
3. Ramped solid surface shower base
If you don’t have the ability to lower the floor and must go with a shower base that has a curb, you can find some solid surface prefabricated shower pans that have a lower than normal threshold, and many offer a ramp to match the color of the base that can be adhered to the bathroom floor just outside the shower.

These two images – above and below – show the solid surface shower bases available from Swanstone, that are barrier-free, but if you’re installing them on the subfloor (without lowering subfloor as detailed earlier), will still need a ramp to bring a wheelchair up from bathroom tile surface level to shower floor level…

If you’re interested in these solid surface shower bases from Swanstone, you can see the actual barrier-free shower bases on Amazon here, and you can see the floor ramps that accompany them here. Be sure when picking out the one you want, you click to the correct size/dimensions of shower base on the Amazon product page, and that you also get the colors of the base and the ramp to match!
4. Fiberglass or acrylic shower base
This is the least attractive option, but also the most inexpensive…so if your budget only allows for this, it will work. But beware that it yellows over time and takes up stains quite easily, from mold, mildew, soap scums, and soaps & shampoos as well. Also, they tend to creak as you step and move around on the shower pan, and can get brittle over time.
5. Create an entire “wet room” bathroom
Although not too common in the U.S., in Europe and other parts of the world, you’ll sometimes see an entire room drains toward the shower drain, not just the shower. What you can’t see underneath all the tile, is that the entire bathroom floor is waterproofed, so any water that permeates the tile floor, will work its way toward the drain. If you’re going to make your whole bathroom into a wet room, wall-mounted sinks, toilets and other fixtures help keep the floor open so that any water moves freely toward the drain (and it’s easier for washing down the room and cleaning).
References & Resources
- NC State | The Center for Universal Design – Curbless Showers: An Installation Guide
- Schluter Systems – Curbless Showers
- 2010 ADA Standards for Accessible Design – USA Dept of Justice